Smart Irrigation System Using IoT
Hi there, I'm Karthik!
Below is the article detailing the project I have completed on the implementation of a Smart Irrigation System utilizing Arduino microcontrollers and moisture sensors.
HARDWARE REQUIREMENTS
1. ARDUINO UNO (ATMEGA328P)
Arduino Uno is a
popular microcontroller board based on the ATmega328P microcontroller chip. It
is a simple and affordable board with a user-friendly interface that makes it a
great choice for beginners and professionals alike. The ATmega328P chip has 32
KB of flash memory for storing the code, 2 KB of SRAM, and 1 KB of EEPROM. It
also has 14 digital input/output pins, 6 of which can be used as PWM outputs,
and 6 analog input pins. The board also has a USB port that can be used for
programming and power supply. The Arduino Uno can be programmed using the
Arduino IDE (Integrated Development Environment), which is a user-friendly
platform for creating and uploading programs to the board. Arduino Uno is
widely used in various applications such as robotics, automation, home
automation, and many more. Its popularity and ease of use have made it a go-to
choose for many hobbyists and professionals alike.

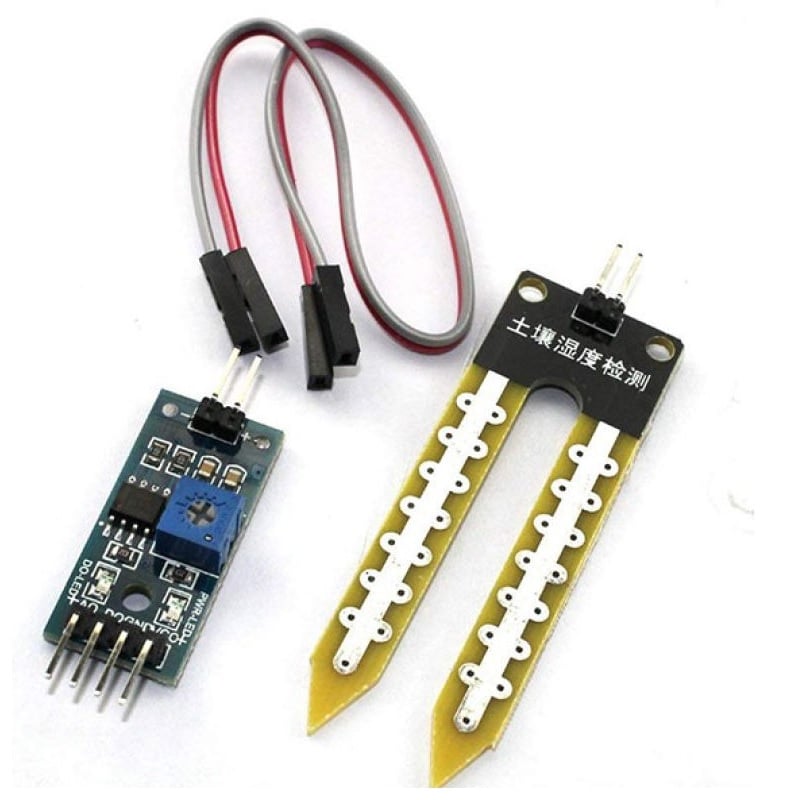
2. soil
moisture sensor
Soil moisture sensors
are electronic devices that measure the amount of water content in soil. They
can be used to monitor soil moisture levels in agricultural fields, gardens,
and other applications where water management is critical. Soil moisture
sensors come in different types, including capacitance sensors, tensiometers,
and resistance sensors. Capacitance sensors measure the dielectric constant of
the soil, which is related to the soil's moisture content. Tensiometers measure
the tension or pressure exerted by soil water on a porous ceramic cup, while
resistance sensors measure the electrical resistance of the soil, which is
inversely related to soil moisture content. Soil moisture sensors can provide
real-time data on soil moisture levels, which can help prevent over
watering or
under watering and promote healthier plant growth. They are commonly used in
conjunction with smart irrigation systems and can help reduce water usage and
associated costs while improving plant health and yield.
3. ELECTRICAL
SWITCH
A mechanical switch
is a type of switch that uses physical means to make or break a connection in
an electrical circuit. It consists of a movable contact, which is connected to
a mechanical actuator, and a stationary contact, which is connected to a
circuit. When the actuator is moved, the movable contact comes into contact
with or moves away from the stationary contact, completing or breaking the
circuit.

4. 5V
DC RELAY MODULE
A 5V DC relay module
is a type of electronic module that allows a low voltage circuit to control a
higher voltage or current circuit. It consists of a relay switch and a control
circuit that operates the relay switch. The relay switch is an
electromechanical device that opens and closes an electrical contact when an
electric current is applied to its coil. The control circuit consists of a
transistor, diode, and resistor, which regulate the current that flows through
the relay coil. It is commonly used in applications that require a low voltage
control signal to activate a high voltage or current device, such as motors,
lights, and solenoids. The module is typically designed to be mounted on a
printed circuit board (PCB) or a breadboard, and it has screw terminals or
headers for easy connection to the control and load circuits.

5. POWER SUPPLY CABLE FOR ARDUINO
The power supply cable for Arduino Uno is a cable that is used to power the Arduino Uno microcontroller board. The cable typically consists of a USB type-A connector on one end and a 2.1mm barrel jack connector on the other end. The USB connector is plugged into a USB port on a computer or USB wall adapter, and the barrel jack connector is plugged into the power input of the Arduino Uno board.The power supply cable can provide power to the Arduino Uno board from a variety of sources, including a USB port on a computer, a USB wall adapter, or a battery pack with a compatible barrel jack connector. The cable is designed to provide a regulated 5V DC power supply to the board, which is used to power the microcontroller, sensors, and other electronic components that are connected to the board.

6. JUMPER CABLES
Jumper cables are a type of cable used to connect
components in electronic circuits, including the Arduino Uno microcontroller
board. They consist of a flexible wire with a connector on each end that can be
attached to a pin on the Arduino board and another component, such as a sensor
or an LED.Jumper cables used with the Arduino Uno typically have male-to-male
or male-to-female connectors. Male-to-male jumper cables are used to connect
pins on the Arduino board to each other or to a breadboard, while
male-to-female jumper cables are used to connect pins on the board to sensors
or other components.Jumper cables are available in a variety of lengths and
colours, which makes it easy to organize and label connections in complex
circuits. They are also available in different wire gauges, which affects the
amount of current that can be carried through the cable.

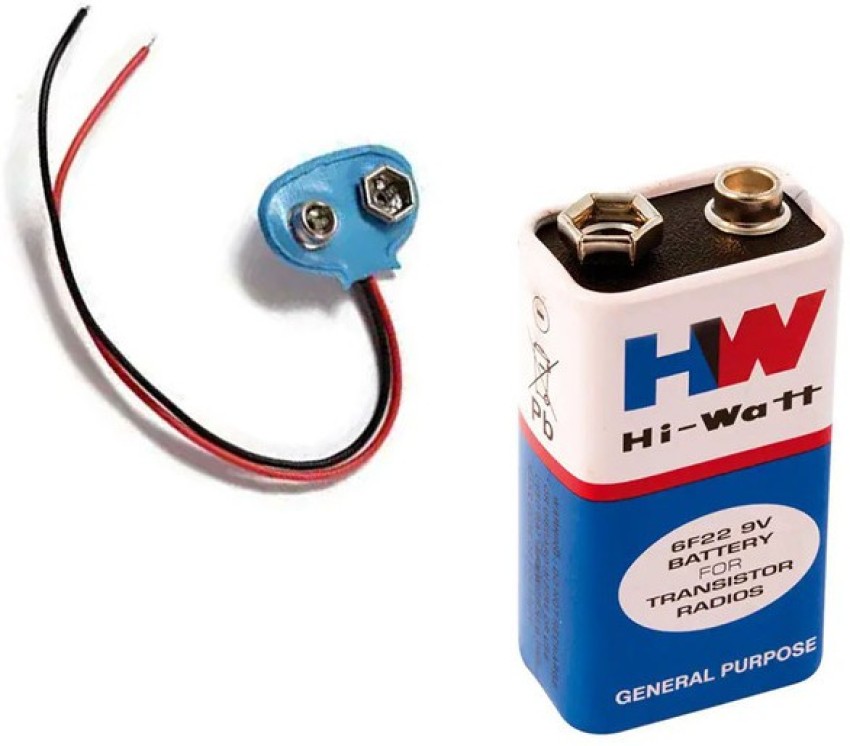
7. 9V BATTERY
A 9V battery is a type of disposable or rechargeable
battery that is commonly used in electronic devices such as smoke detectors,
guitar pedals, and other portable devices. It is a rectangular-shaped battery
that measures approximately 48mm x 26mm x 17mm and has a nominal voltage of 9
volts.

DESIGN OF ELECTRONIC CIRCUIT

Connections
Digital Pin ‘3’→
Input terminal of relay module
Digital pin ‘6’ → ‘DO’ pin of soil moisture sensor
‘5V’ of Arduino
→ ‘VCC’ pin of relay module
‘GND’ of Arduino
→ ‘GND’ pin of relay module
‘GND’ of Arduino
→ ‘GND’ pin of soil moisture sensor
‘Vin’ of Arduino
→ ‘VCC’ pin of soil moisture sensor
‘CC’ port of relay
→ ‘-Ve’ terminal of motor pump
‘NO’ port of relay
→‘+Ve’ terminal of motor pump
(NOTE: You can connect the single
pole switch between the motor pump and the output terminals of relay module, in
order to create a circuit break which allows the user to turn ‘ON’ and ‘OFF’
the system according to his wish.)
PROGRAMMING THE ARDUINO UNO
►The code given below is a
simple program to start irrigation when moisture is detected and stop it when
moisture is not detected.
Program
Int moisture; // random
variable
void setup
{
pinMode(3,OUTPUT); // Output pin
for relay module
pinMode(6,INPUT); // input pin
sending signal from soil moisture sensor
}
void loop()
{
Moisture = digitalRead(6); //
reads the incoming signal from soil moisture sensor
if (moisture == HIGH)
{
digitalWrite(3,LOW); // if
moisture content in soil is high turn of relay
}
else
{
digitalWrite(3,HIGH); // if
moisture content in soil is low turn on the relay
}
delay(390);
}

// Pin assignments
const int moisturePin = A0;
const int pumpPin = 2;
// Moisture level threshold
for irrigation (adjustable by user)
int moistureThreshold = 500;
void setup() {
// Initialize serial communication
Serial.begin(9600);
// Set pump pin as output
pinMode(pumpPin, OUTPUT);
}
void loop() {
// Read moisture level from analog pin
int moistureLevel = analogRead(moisturePin);
// Print moisture level to serial monitor
Serial.print("Moisture
Level: ");
Serial.println(moistureLevel);
// Check if moisture level is below the
threshold
if (moistureLevel<moistureThreshold) {
// Turn on the pump
digitalWrite(pumpPin, HIGH);
Serial.println("Irrigation
system activated.");
} else {
// Turn off the pump
digitalWrite(pumpPin, LOW);
Serial.println("Moisture
level satisfactory.");
}
// Delay before next reading
delay(1000);
}
Placing
sensors at multiple depths and locations in the field is a recommended practice
for effective irrigation management. Here are the steps involved in the sensor
placement,
- Sensor Placement:
- Install sensors at multiple depths within the
crop root zone (e.g., one-third and two-thirds depth) to monitor soil
moisture at different levels.
- Place sensors at two or more locations in the
field to capture spatial variability in soil moisture.
- Avoid high points, depressions, and slopes
when selecting sensor locations to ensure representative measurements.
- Managing Different Soil Types:
- In fields with varying soil textures, monitor
and manage each soil type separately for irrigation.
- Use field mapping technologies like
electromagnetic conductivity (EM) mapping to identify and delineate
different soil zones.
- Create management zones based on soil type to
implement tailored irrigation strategies for each zone.
- Benefits of Separate Soil Management:
- Different soil types have varying water
holding capacities, requiring customized irrigation approaches.
- Separately managing soil types allows for
precise irrigation matching the needs of each soil zone.
- Optimized irrigation promotes water-use
efficiency, reduces water wastage, and improves crop health and productivity.
- Considerations for Field Mapping:
- Electromagnetic conductivity (EM) mapping is a
useful tool to identify soil variability based on electrical conductivity
measurements.
- EM mapping helps identify areas with different
soil textures and water-holding capacities, aiding in the creation of
management zones.


Comments
Post a Comment